You need:
- 1 firm, not overripe pear (1 pear = 1 serving)
- Spices! This is where you can get a little creative if you know your way around the spice cabinet. If not, no worries! Grab some cloves, star anise and juniper berries to soak and flavour your pear
- Cinnamon (optional, to sprinkle over your pear after cooking)
- Poaching liquid (I like to poach my pears in 100% organic juices if I don’t have time to make my own organic apple or pear juice)
- 1 medium saucepan (for poaching)
- Baking paper to create a ‘cartouche’ – a paper lid you place on top of your item in the saucepan to slow down the reduction of moisture in cooking.
To prepare:
- Peel pear. Cut in half and remove seeds (I carve them out neatly with a mini melon baller).
- Pour poaching liquid into pot and bring to a boil – you should see tiny bubbles floating slowly to the surface.
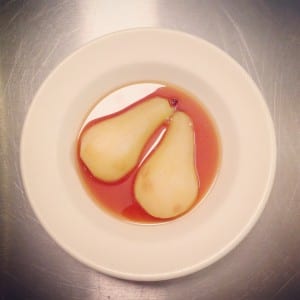
- Once boiling, lower heat and add pears, placing your homemade cartouche on top of pears in saucepan – see image below…

My ‘cartouche’ covering my pears to help them poach perfectly! This is the key to getting evenly poached pears.
- Let pears poach for at least 15 mins before checking for softness by inserting a toothpick or cake tester into the flesh of the pear. HINT: your toothpick should slide into the pear easily; your pears should feel tender but not mushy.
- When ready, remove pears from pot carefully and transfer to a plate to cool a little before serving (be careful not to burn your mouth!)
Extra bonus step to make use of your poaching liquid … I prefer to do this because it’s yummy and reduces wastage.
You need:
- poaching liquid
- small-medium frying pan
To prepare:
- Reduce your poaching liquid to a syrup by removing your cartouche and transfering your liquid to a small-medium fry pan. Increase heat to a simmer and fight the need to stir the liquid!
- Wait to see the liquid heat up and create bubbles. It will slowly begin to shrink in size. You may stir occasionally, but not constantly because you’ll release too much heat which will mean it will take a lot longer to reduce.
- Take off heat when you’re satisfied with consistency. I like mine quite thick and syrup-y, but you might like to reduce to a more liquid-looking sauce for presentation and taste. A good way to do this is to stop reducing liquid when it coats the back of a spoon. (also called nappé)
- Pour liquid over pears, or chill and keep for later – maybe try it combined with a small bowl of plain brown rice and some crushed nuts (yes, I know this sounds weird, but it tastes so good!)
Danielle Shine is a Natural Foods Chef, yoga-loving wife of a talented artist. She writes regularly about health, happiness and food so we can all shine together. Through her love of cooking, she would like to inspire you to prepare, eat and enjoy real food – not stuff that comes in packets with unpronounceable names.
I’m a Natural Foods Chef, yoga-loving wife of a talented artist. Writing regularly about health, happiness and food so we can shine together.
My qualifications include –
Natural Foods Chef (Natural Gourmet Institute), New York City
Integrative Nutritionist Health Coach (Institute of Integrative Nutrition)
Vinyasa Flow Yoga (Yoga Trinity Australia)
Personal Trainer (Australian Institute of Fitness)
Bachelor or Communication, Public Relations and Management (University of Canberra, ACT)